Getting started
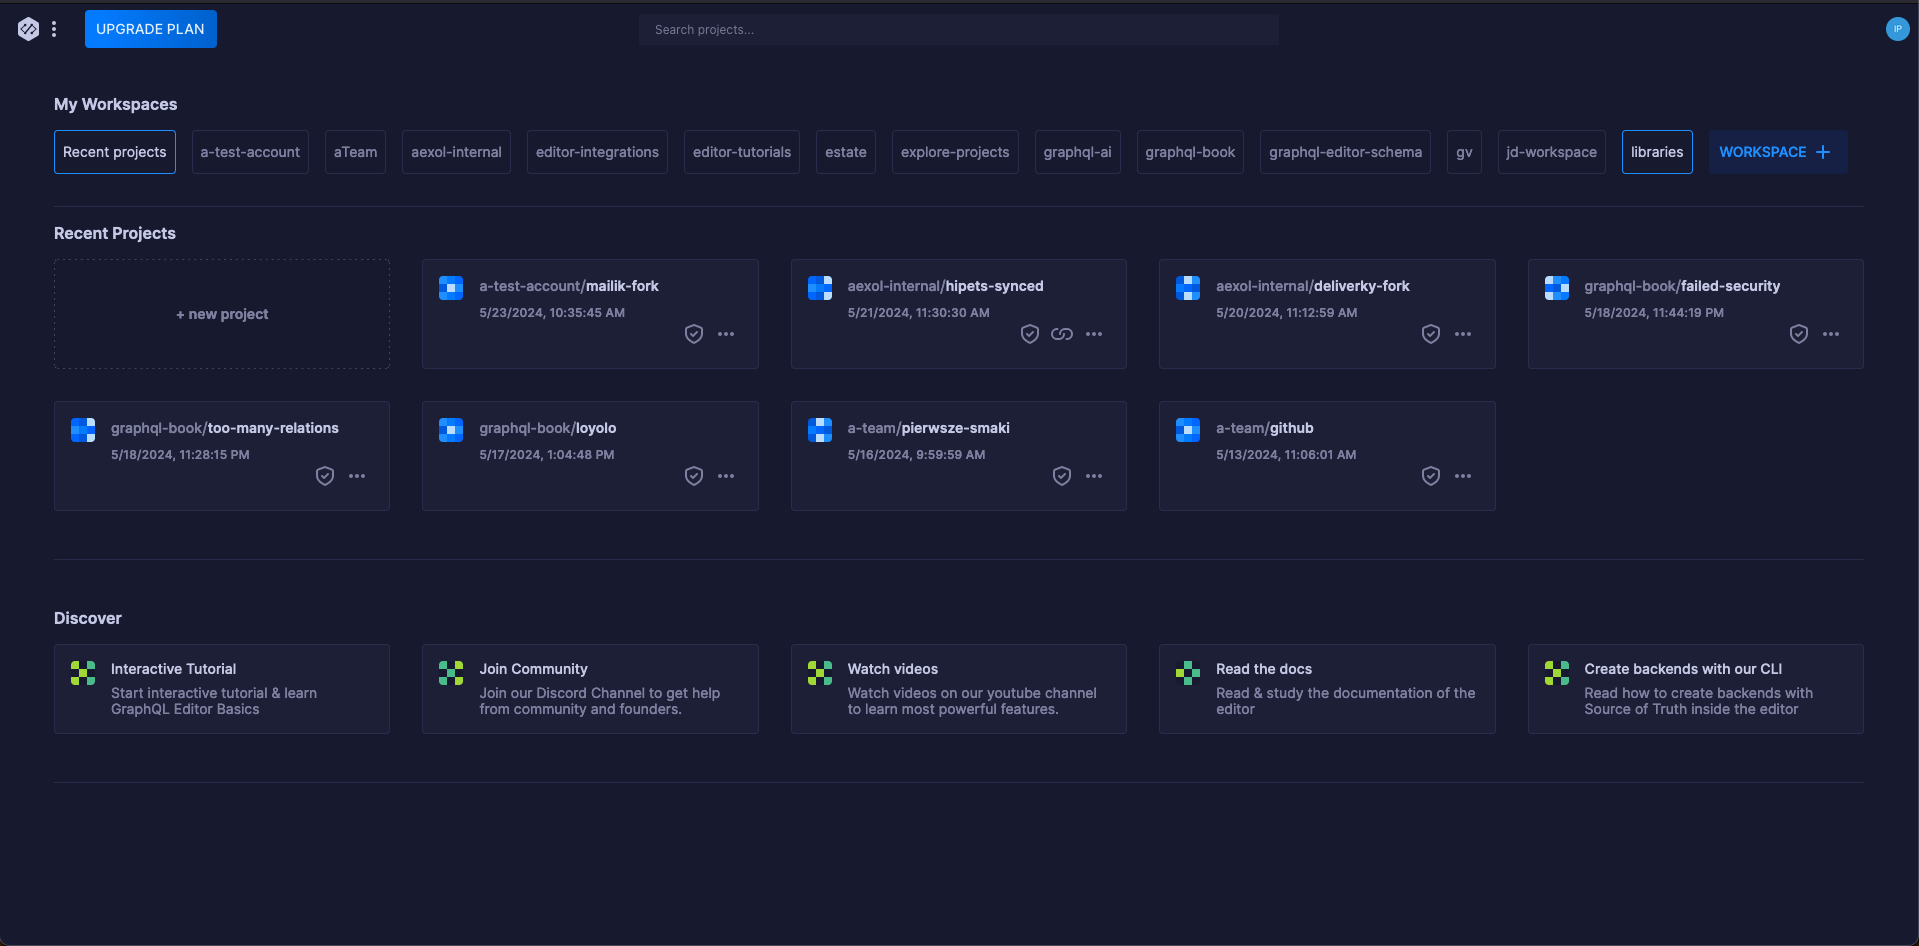
At the beginning of your journey you can see the main GraphQL Editor screen. To create workspace
Workspaces are used to organize projects. Each workspace consists of all the workspace members invited to it, and their projects.
Workspaces

To create a workspace click the Add workspace button. Insert your unique namespace name and/or invite some members.
Member roles
- Owner - Creator of the workspace. The team owner can add/remove/edit/view projects and members of a team. Only the owner can delete the team.
- Admin - can add/remove/edit/view projects and members in a team (except for the owner).
- Editor - can add and edit projects in your team.
- Viewer - can view projects in read-only mode, seeing only the Graph part of the schema.
Inviting members
There are 2 ways of inviting members, both are in the Edit Team menu:
By email
Type in the email of the user you want to invite. It doesn't matter if they have a GraphQL Editor account. Simply click Add member and **** then set their role.
By magic link
Click Magic links in the Edit Team menu. Click Create Magic Link, set the allowed domain, expiration date and the role you want to assign to the recipient. Then share it with them and when they click it they will be on the team.
Projects
Create a project
You can create a project with different options this page explains how to use them
Project types
You can start your project in many ways.
Blank
Create an empty project.
With Libraries
Attach some of basic libraries for the project. Libraries:
- neo4
- apollo
- dgraph
- aws
From URL
Import the schema using GraphQL Introspection from the provided URL
Readonly Synced
You can check this option to have readonly schema that will be always fetched from URL
Headers
Provide Headers if they are needed.
CORS
GraphQL Editor bypass CORS through CORS proxy.
From Github
Schema will be imported from .graphql file in your github repository. You can commit changes to github later.
AI Generation
In Blank and With Libraries option you can use AI prompt to generate initial schema.